Mounting accessories on a bike road integrated handlebar is a crucial aspect for cyclists who wish to enhance their riding experience. As a supplier of bike road integrated handlebars, I’ve witnessed firsthand the importance of proper accessory installation. In this blog, I’ll share some insights on how to mount various accessories on these handlebars effectively. Bike Road Integrated Handlebar
Understanding the Bike Road Integrated Handlebar
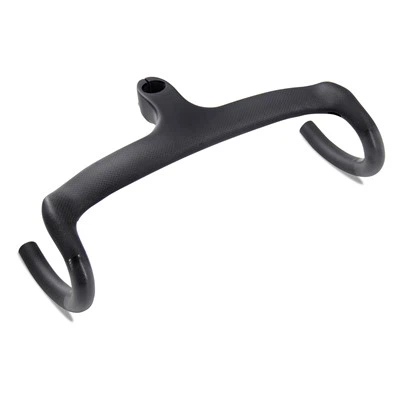
Before we dive into the mounting process, it’s essential to understand what a bike road integrated handlebar is. These handlebars are designed to integrate multiple functions and components seamlessly. They often combine the brake levers, shifters, and sometimes even the cable routing within the handlebar itself. This integration not only provides a sleek and aerodynamic look but also improves the overall performance of the bike.
The design of the integrated handlebar can vary significantly between different models and manufacturers. Some handlebars have a more streamlined shape, while others may have additional features such as built – in storage compartments or electronic interfaces. Understanding the specific design of your handlebar is the first step in mounting accessories correctly.
Types of Accessories and Their Mounting Considerations
1. Bike Computer
A bike computer is a popular accessory that provides cyclists with valuable information such as speed, distance, and cadence. When mounting a bike computer on an integrated handlebar, you need to consider the following:
- Mounting Location: Look for a flat and stable area on the handlebar. Most integrated handlebars have a dedicated area near the center, which is ideal for mounting a bike computer. This location allows for easy visibility while riding.
- Mount Compatibility: Ensure that the mount of your bike computer is compatible with the handlebar. Some bike computers come with universal mounts, while others may require a specific type of mount. You may need to purchase an adapter if the mount doesn’t fit directly.
- Cable Management: If your bike computer has cables, make sure to route them neatly along the handlebar. You can use cable ties or clips to keep the cables in place and prevent them from getting tangled.
2. Lights
Lights are essential for safety, especially when riding at night or in low – light conditions. When mounting lights on an integrated handlebar:
- Front or Rear: Determine whether you are mounting a front or rear light. Front lights are usually mounted on the front of the handlebar, while rear lights can be mounted on the back or side.
- Mounting Strength: Since lights need to be securely attached to withstand vibrations and impacts, choose a mount that provides a strong hold. Some lights come with their own mounts, while others may require an additional mounting bracket.
- Angle Adjustment: Make sure you can adjust the angle of the light to direct the beam where you need it. This is particularly important for front lights to ensure proper illumination of the road ahead.
3. GPS Devices
GPS devices are useful for navigation and tracking your rides. When mounting a GPS device on an integrated handlebar:
- Mounting Stability: Similar to bike computers, GPS devices need to be mounted securely. Look for a mount that can hold the device firmly in place, even during bumpy rides.
- Visibility: Position the GPS device in a way that it is easily visible without obstructing your view of the road. This may require some trial and error to find the best location.
- Power Supply: If your GPS device requires a power supply, you need to consider how to connect it. Some integrated handlebars have built – in power ports, while others may require you to run a cable from the bike’s battery.
4. Bottle Cages
Bottle cages are necessary for carrying water during rides. When mounting bottle cages on an integrated handlebar:
- Space Availability: Check if there is enough space on the handlebar to mount a bottle cage. Some integrated handlebars may have limited space due to their design.
- Mounting Style: There are different types of bottle cage mounts, such as clamp – on or bolt – on. Choose the one that is compatible with your handlebar and provides a secure fit.
- Accessibility: Mount the bottle cage in a location where you can easily reach the water bottle while riding. This is usually on the side of the handlebar within arm’s reach.
Step – by – Step Mounting Process
Step 1: Gather the Necessary Tools
Before you start mounting the accessories, gather all the tools you need. This may include Allen wrenches, screwdrivers, cable ties, and mounting brackets. Make sure you have the correct size tools for the job.
Step 2: Clean the Handlebar
Clean the area of the handlebar where you will be mounting the accessory. Use a mild detergent and a clean cloth to remove any dirt, grease, or debris. This will ensure a better grip for the mount.
Step 3: Prepare the Accessory and Mount
If the accessory comes with a mount, assemble it according to the manufacturer’s instructions. Make sure all the parts are properly tightened and in place.
Step 4: Position the Accessory
Carefully position the accessory on the handlebar in the desired location. Use a marker or tape to mark the position if necessary. Make sure the accessory is level and aligned correctly.
Step 5: Attach the Mount
Once the accessory is in the correct position, attach the mount to the handlebar. If it is a clamp – on mount, tighten the clamp using the appropriate tool. If it is a bolt – on mount, insert the bolts and tighten them securely.
Step 6: Check the Stability
After attaching the mount, check the stability of the accessory. Shake the handlebar gently to see if the accessory moves or wobbles. If it does, adjust the mount or tighten the bolts further.
Step 7: Route Cables (if applicable)
If the accessory has cables, route them along the handlebar in a neat and organized manner. Use cable ties or clips to secure the cables and prevent them from getting in the way.
Troubleshooting Common Issues
1. Mounting Compatibility
If you find that the mount of your accessory is not compatible with the handlebar, you have a few options. You can try to find an adapter that will make the mount fit. Some manufacturers offer adapters for different types of handlebars. Alternatively, you can look for a different accessory that comes with a compatible mount.
2. Loose Mounts
If the mount of your accessory becomes loose over time, it may be due to vibrations or improper tightening. Check the bolts or clamps and tighten them if necessary. You can also use a thread – locking compound to prevent the bolts from loosening.
3. Cable Tangling
Cable tangling can be a frustrating issue. To prevent this, make sure to route the cables carefully and use cable ties or clips to keep them in place. You can also consider using cable management systems that are specifically designed for bike handlebars.
Conclusion

Mounting accessories on a bike road integrated handlebar requires careful consideration and the right approach. By understanding the design of the handlebar, choosing the right accessories and mounts, and following the proper mounting process, you can ensure that your accessories are securely attached and function properly.
Bike Saddle As a supplier of bike road integrated handlebars, we are committed to providing high – quality products and support to our customers. If you are interested in purchasing our handlebars or have any questions about accessory mounting, we encourage you to contact us for further discussion. We look forward to working with you to enhance your cycling experience.
References
- Cycling Equipment Manuals from various manufacturers
- Bicycle Maintenance Guides from professional cycling organizations
- Online cycling forums and communities where cyclists share their experiences and tips on accessory mounting.
Hunan Yecheng Technology Co., Ltd.
We’re well-known as one of the leading bike road integrated handlebar manufacturers and suppliers in China, also support customized service. Please feel free to buy high quality bike road integrated handlebar for sale here from our factory. For more information, contact us now.
Address: Changsha, Hunan Province, China.
E-mail: info@rxlsl.com
WebSite: https://www.rxlsl.com/