Alright, let’s cut to the chase—if you just dropped a stack of new RC helicopter batteries in your workspace, you’re not just holding some random power cells. You’re holding the thing that’s gonna make that 600-sized heli hover like it’s glued to the sky, or turn a 450’s 3D flips into smooth, repeatable moves. But here’s the tea: half the guys I’ve chatted with in the RC crew skip the break-in process and wonder why their batteries die 10 flights in, or puff up like overinflated footballs, or won’t hold a charge worth a dang. RC Heli & Airplane Battery
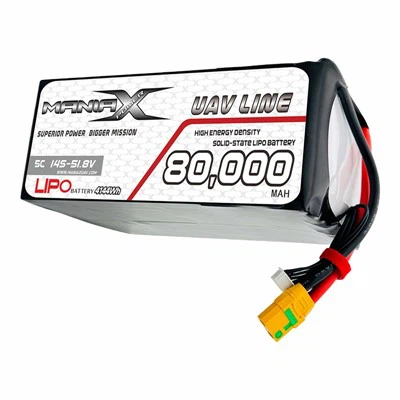
I’ve been deep in the RC heli and airplane battery game for years—hell, I see hundreds of these batteries roll through our shop every week, and the #1 question that comes up is still: “Why do I need to break in a new LiPo (lithium polymer, for the newbies) battery?” Let’s start with the science without making your eyes glaze over. When a LiPo leaves the factory, the electrodes inside are fresh, but the solid electrolyte interface (SEI)—that’s the thin, protective layer that keeps the battery from eating itself alive—isn’t fully formed yet. It’s like a new mattress: it’s lumpy, firm, and needs a few uses to soften up and become comfortable. Skip the break-in, and that SEI layer gets all rough and uneven, leading to shorter run times, faster capacity loss, and even safety risks. For RC helicopters, where you need consistent power mid-flight, that’s not just an inconvenience—it’s a crash waiting to happen.
Now, let’s get into the actual steps. I’m not here to give you a 10-page manual that you’ll scroll past at 2x speed. These are the real, no-BS steps I teach every customer who buys a battery from us, plus the little hacks I’ve picked up from messing up my own break-ins (RIP that first 5200mAh pack I ruined because I rushed it).
First off: What you’ll need. Don’t overcomplicate this. You already have most of this stuff if you fly RC. A smart LiPo charger (not that cheap no-name one you found in a bargain bin—trust me, that’s how fires start), a LiPo safe bag (non-negotiable, even for break-ins), a way to check cell voltage (most chargers do this now, but a separate checker is fine too), and a spot where you can keep an eye on things—away from fabric, paper, any flammable crap. Also, pro tip: grab a low-current setting on your charger. We’re talking 0.5C to 1C max here. For those who don’t know what C means: C is the battery’s discharge rate. A 5000mAh battery is 5Ah, so 1C is 5A. Keep it low for break-ins.
Step 1: Inspect the battery before you do anything. This is non-negotiable. Pull it out of the packaging, run your fingers over the entire surface—no dents, no scratches, no puffiness, no weird sticky residue. If anything looks off, hit us up ASAP (more on that later). A new battery should be firm, like a hardcover book. If it’s squishy, send it back. Also, check the cell voltage. Most new packs are charged to around 3.8V per cell, but sometimes they’re at a storage charge (3.7V per cell) for shipping. If any cell is below 3.6V, give it a tiny top-up with the low-current setting—don’t crank it.
Step 2: Set up your charger correctly. This is where so many people mess up. Go into your charger settings, select LiPo battery, pick the number of cells (that’s on the battery label—3S is 3 cells, 4S is 4, etc.), and set the charge current to 0.5C. For a 5000mAh pack, that’s 2.5A. For a 3300mAh pack, that’s 1.65A. Don’t go higher than 1C here, even if your charger says it’s fine. I know you’re in a hurry to fly, but this part makes all the difference. Also, make sure your charger is set to “balance charge” mode, not just “fast charge.” Balancing ensures each cell charges to the exact same voltage, which is key for even capacity and long life.
Step 3: The first charge. Pop the battery into the charger, zip it into the safe bag, and walk away. Wait—don’t hover over it. Just go grab a soda, check on your heli blades, whatever. The charge will take a few hours at this low current. When it’s done, your charger will beep, and each cell should be around 4.2V (full charge for LiPos). Now, let it rest for like 30 minutes. Don’t immediately plug it into your heli. Let the cells stabilize. I’ve had guys plug it in right after charging and get weird voltage readings—waste of time.
Step 4: The first discharge. This is the part most people skip entirely, and it’s a game-changer. You need to run the battery down at that same low current. Again, why? Because that SEI layer needs to form on both charge and discharge, not just charge. Now, you don’t want to fly your heli full 3D here. Do a gentle, hover-only flight. 5 to 7 minutes max. Just get it off the ground, hover at eye level, maybe a little forward/back, no flips, no full-power climbs. Land it before the battery hits the low-voltage cutoff. For most 3S packs, that’s around 3.2V per cell, so keep an eye on your telemetry. If you don’t have telemetry, land when the heli starts to feel slow and lethargic—don’t push it.
Step 5: Repeat the charge-discharge cycle 3 to 4 times. That’s it. No more, no less. Each time, use the same low current for charge and discharge. After the first cycle, you can bump the charge current up to 1C (if you want), but keep discharge low for the first few. By the third or fourth cycle, your battery will be “broken in.” You’ll notice it holds a full charge longer, and the power delivery is smooth, not jumpy.
Wait, but what about different battery types? Like, Li-ion vs LiHV vs the fancy high-capacity packs for big helis? The same rules apply, mostly. LiHV (high-voltage) packs just have a slightly higher full charge voltage (4.35V per cell instead of 4.2V), so just make sure your charger is set to LiHV mode. For smaller packs (like 1500mAh for micro helis), keep the current at 0.5C—don’t try to rush it, even if it’s a tiny pack. Big 6S packs for 800-class helis? Same thing, low current for the first few cycles, balance charge every time.
Now, let’s talk about the mistakes I’ve seen people make, so you don’t make ’em. First mistake: Skipping the break-in entirely. I had a customer last month buy a pair of 6S 5200mAh packs for his 700 heli, skip the break-in, fly them hard for 5 flights, and one of them puffed up mid-air. Luckily, he landed safely, but the battery was toast. We replaced it for him, but it was a headache for everyone. Second mistake: Using too high a current for break-in. A buddy of mine cranked a new 4S pack to 3C for the first charge, and the cells got so hot he could barely hold the pack. That’s why we stress low current—too much heat damages the electrodes before the SEI layer is ready. Third mistake: Forgetting the safe bag. Even during break-in, stuff can go wrong. LiPos are sensitive, and if a cell is faulty, a low-current charge isn’t gonna stop it from failing. Always use the bag. Fourth mistake: Flying hard during the first discharge. I get it—you wanna test the power. But gentle flights only. The SEI layer is fragile early on, and high current discharge during that time causes uneven wear.
Now, a little pro tip for extending your battery’s life even after break-in. After the first 3-4 cycles, you can start using normal charge currents (1C to 2C for most packs, depending on the battery’s rating). But always balance charge, never fast charge all the way. And if you’re not gonna fly for more than a week, store the battery at around 3.8V per cell—that’s the storage voltage, which keeps the SEI layer healthy when the battery is idle.
Here’s the thing: We don’t just sell batteries here. We’re RC guys too. We fly helis, we mess up flips, we curse when a battery dies mid-hover, and we know that a good battery is the backbone of every good flight. That’s why we stand behind every pack we sell, and that’s why we teach this break-in process to every customer. If you’ve got a new battery that you skipped breaking in, or if you’ve been having issues with run time or puffiness, hit us up. We don’t do boring sales pitches—we’ll shoot straight with you, whether you need a replacement pack, a charger upgrade, or just advice on your setup.
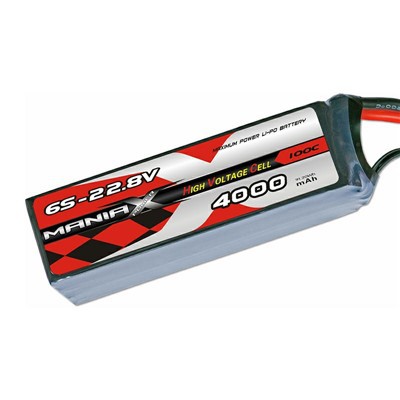
At the end of the day, breaking in a new RC helicopter battery isn’t rocket science. It’s 5 simple steps, takes a few hours of your time, and it will make your batteries last twice as long, run better, and be way safer. I’ve seen it work time and time again. So next time you unbox a new pack, don’t just plug it in and go fly. Take the 2 hours to do the break-in. Your heli (and your wallet, since you won’t be buying new batteries every month) will thank you.
4.45V Drone Solid-state Lipo Battery 280Wh/kg References:
- Lithium Polymer Battery Safety and Best Practices, Academy of Model Aeronautics (AMA)
- LiPo Battery Formation Cycling for RC Applications, RC Battery University (digital resource)
- Understanding Solid Electrolyte Interphase (SEI) in Lithium-Ion Batteries, Journal of Power Sources, 2019
ManiaX Power Technology Co., Ltd.
ManiaX Power Technology Co., Ltd. is one of the most reliable rc heli & airplane battery manufacturers and suppliers in China, also supports customized service. Please feel free to wholesale bulk durable rc heli & airplane battery made in China here from our factory.
Address: Room 1508, 15/F, Two Grand tower, 625 Nathan Road, Kowloon, HongKong. P.R. China
E-mail: info@maniax-power.com
WebSite: https://www.maniaxpower.com/
